|
Bangkok is a Season 1 map and the fourth map in the Roulette Trilogy map pool. Its mission is called Club 27, which has two targets, Jordan Cross and Ken Morgan. Bangkok is generally difficult to traverse and is widely considered the hardest map for deleting the evidence. For this reason, Bangkok has a reputation for being one of the hardest two-target maps, while in reality most spins can be simplified into a small number of templates, depending on whether Jordan can be eliminated in the first minute or so. To compete in Bangkok, players are encouraged to reach Mastery Level 19, as the last and most powerful starting location (Recording Crew) is locked behind it. Unlocking the final level of Mastery is also beneficial, as it unlocks the Krugermeier 2-2, a valuable firearm that is significantly quieter than the standard ICA pistols (Note: a Krugermeier reskin can also be unlocked at Mendoza Mastery Level 10).
Map Guides use a three-color system to classify strategies and templates:
🟢 Essential knowledge for getting started on the map. 🟡 Intermediate techniques that help players compete on a wider range of spins. 🔴 Advanced methods that help solve even the toughest spins quickly. |
|
||||||||||||

¶ Planning

Of the eight starting locations in Bangkok, seven are used in roulette. While this may seem daunting at first, the correct start can usually be deduced from Jordan's disguise condition. 47's Suite is the only relevant suit start (Riverside is rarely used due to its distance from Jordan), while Kitchen Staff is only used for spins requiring the cake topper (Jordan Consumed Poison). The remaining starts are tied to specific Jordan disguises; see the Disguises section for details.
The most powerful starting location in Bangkok is Recording Crew. Not only does it provide quick access to three upstairs disguises, but it is also the preferred start for most remote-kill setups.
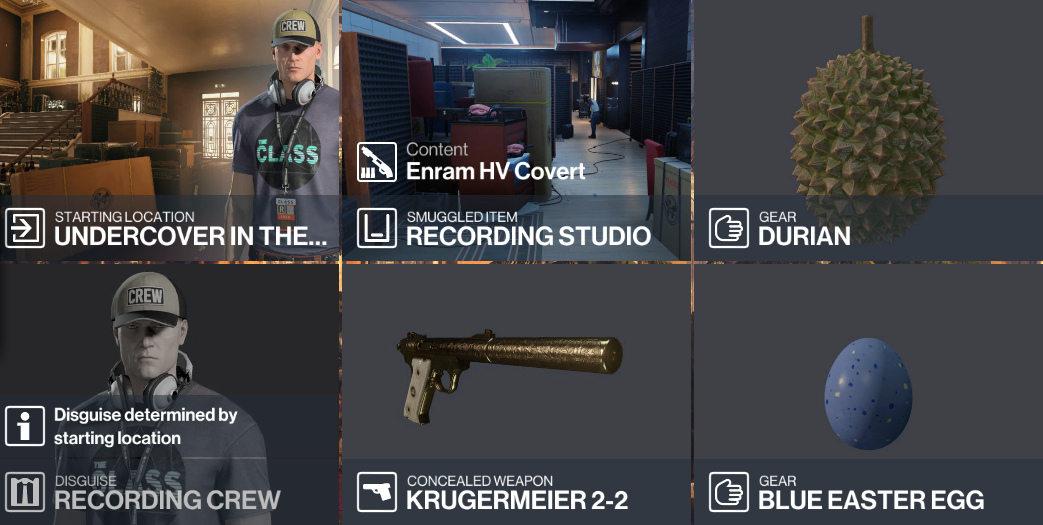
The simplicity of isolating the Bangkok targets, combined with the relatively accessible disguises on the map, means that very little of the loadout is forced. Under the current meta, Jordan requires no items to isolate, while Ken typically needs to be made sick with an emetic item. For this purpose, the Durian is by far the most popular option, although a Sieker can also be used when the loadout is restrictive.
Bringing a sedative item for disguise grabs is largely a comfort choice. Most players bring a Blue Egg to fill the secondary item slot, although there is also merit in bringing a Kalmer. The firearm slot is typically occupied by a Pistol, while the Kalmer is also a viable alternative here. Certain templates, however, such as Bugman, are significantly easier with a pistol.
The choice of smuggled item location depends largely on the target involved. For straightforward Jordan kills, items are usually smuggled into the Recording Studio, while the Storage Room is preferred for most Ken kills as well as Bugman spins.
¶ Strategies
Despite Jordan being difficult to reach in his fortified recording studio, and Ken roaming a largely public area with his personal bodyguard Otis, Bangkok is a map built around a small number of powerful isolation methods. Both targets have straightforward isolation methods that allow them to be killed live and/or loud, enabling most spins to be completed in a timely manner.
The most complicated Bangkok spins usually involve a Jordan kill with an inconvenient disguise or kill method. These spins are often tackled by bringing him out of the recording studio, saving the time required to travel up to Jordan twice in a single spin.
🟢 Jordan Chain Lure (itemless): The simplest way to isolate Jordan, right from Recording Crew start.
Start Recording Crew and make your way to Jordan. Before he leaves the recording booth at around 0:40, throw an item at the edge of the carpet to chain lure him into the bathroom.🟡 Jordan Booth (itemless): Speed up a silent Jordan kill by dealing with him in the booth after 0:25.
Instead of luring him outside, Jordan can also be isolated or killed in the sound booth. If this is done after he starts talking at around 0:25, he will remain unfound forever; otherwise, a Recording Crew will find him at around 2:40. Be aware, however, that most firearms fired inside the booth will be heard outside, as will a Breaching Charge.🟢 Jordan Peekaboo (itemless): The typical Jordan isolation in trespassing disguises at 1:00.
Jordan is most often isolated with a peekaboo at around 1:00. To perform it, take your trespassing disguise to the pipe leading up to the recording studio and hop over the ledge by 0:47. After waiting for the lone Recording Crew upstairs, Jordan can be peekabooed to either the bathroom or the balcony.🟡 Jordan Bugman (Pistol): For tougher and longer Jordan kills, while dealing with Ken first.
Start as Hotel Security and take the Exterminator disguise, as well as the insecticide. Talk to the hotel director, who will call Jordan to walk down to the atrium. Assuming the lure is triggered at around 0:30, Jordan sits down at around 3:40 and 4:30, the insecticide should be used then. Alternatively, for live kills, put a briefcase on the green box in the Storage Room and shoot the glass, causing Jordan to investigate it, sometimes with one or two bodyguards.🔴 Jordan Suit Bugman (Pistol): For tougher and longer Jordan kills, more technical from Suit start.
Start in 47's Suite and reach the storage floor by triple-shooting or tranqing the frisk guards behind the bar. Shoot the wall and throw an item at the camera to lure the guard and the Exterminator. Take the latter's disguise and talk to the hotel director, typically at the reception at around 1:00.🟢 Ken Emetics (Durian): Isolate Ken at any time, with a drop of a Durian.
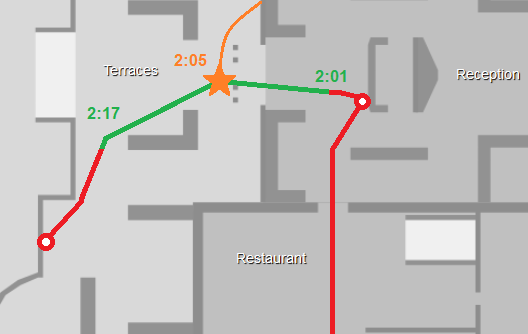 Ken is one of the easiest targets in the trilogy to isolate with an emetic item. In Bangkok, the Durian is preferred, as it can be used legally at any point in his cycle. When made sick, Ken will almost always walk to the Restaurant Toilets. The main exception is immediately after leaving the reception (around 2:00 to 2:17, see image), when he is closer to the Basement Toilet.
🟡 Kenetic Impact (Durian): Make Ken sick from the recording studio.
Typically, after isolating or killing Jordan, head to the office with the two bodyguards. Knock out both of them, then break the window with a gun or briefcase. Swap shoulders and aim the Durian from the doorway towards the right-middle section of the window. Release the Durian as Ken's icon leaves the reception building (around 2:05). He should then walk to the basement with or without his bodyguard.🔴 Ken Patio (Durian, Briefcase/Coins): Make Ken's guard sick, then deal with Ken in a blind corner.
After the Kenetic window has passed, the quickest way to kill Ken is on the Patio at around 3:10. This is done by making his bodyguard sick, then placing coins or a Briefcase near the corner of Ken's table so that he investigates it. Any quiet kill method can be used here, and the body will remain unfound even after Otis returns from puking.¶ Disguises
Disguise grabs in Bangkok are either needed for an early Jordan kill, in which case it is useful to learn how to reach Jordan within the first minute in every disguise, or they are acquired later in the spin for Ken kills, late Jordan kills, or Bugman setups. Typically, disguises in Bangkok require no items to obtain, although bringing at least one sedative is recommended for convenience.
Disguise resources for Bangkok
| Disguise | Getting to Jordan early | Ken kills and Bugman spins | |
|
Suit | Start Suite, run through the rooftop by distracting the two Groundskeepers and a Recording Crew, then peekaboo him upstairs. | Suit for Ken and a disguise for Jordan is a tricky template: either rush Ken and catch Jordan late, or consider Suit Bugman. |

|
Abel de Silva | Start Suite, peekaboo Abel to the side room. Use the stairs to enter the studio and catch Jordan upstairs without him seeing you. | On the balcony for roughly 20 seconds every two minutes: at 0:30, 2:30, 4:30, etc. | Remote iso with Snail |
|
Exterminator | Start Security, blow up the scooter at 0:06, take the stairs and the pipe into peekaboo. (Alternate grabs with Blue Egg or panic) | Inside near Storage Room, found at 6:20 | Security start into Bugman | Suite start into Suit Bugman |

|
Groundskeeper | Start Groundskeeper to delay Ken | Start Suite and rooftop lure, KO and drag | Both make the peekaboo timing | KO in Laundry Room, never found | Behind Hotel Staff Shed, chain lure or sedate |

|
Hotel Security | Start Security, take the stairs and the pipe into peekaboo. | Inside near Storage Room, lure to box or upstairs | Behind Hotel Staff Shed, use sedative but safe to change |

|
Hotel Staff | Start Hotel Staff, dodge the Storage Room camera, take the stairs and the pipe into peekaboo. | Storage Room with Exterminator | Next to Laundry Room | Restaurant Toilets, bump Waiter first |
|
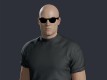
Jordan Cross' Bodyguard | Start Recording Crew, KO the roamer near the booth, or the two in the office. In time for both Jordan Chain Lure and Jordan Booth. | Next to the recording booth, two guards in the office | Above the restaurant, lure and sedate |

|
Kitchen Staff | Start Recording Crew, KO and hide the Kitchen Staff in the kitchen. In time for both Jordan Chain Lure and Jordan Booth. | Basement Laundry Room free | Restaurant Kitchen lure to side room | Restaurant Toilets 3:30 if not a Bugman spin |
|
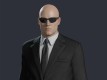
Morgan's Bodyguard | Bugman spin, grab the disguise at the Ken isolation. | Follows Ken during any emetic isolation, preferably a simple KO on Basement timing, or gunflash+subdue on Restaurant timing |

|
Recording Crew | Start Recording Crew, no setup required. In time for both Jordan Chain Lure and Jordan Booth from 0:25. | Lure inside recording booth bathroom | Below Recording Studio alone | Above Restaurant bump, lure and sedate |

|
Stalker | Remote-only disguise, no need to approach Jordan. | Tripleshoot the checkpoint guards from below, or take the pipe from 47's Suite. Alone, free to KO and will not be found. |

|
Waiter | Start Waiter, go through the Reception, take the stairs and the pipe into peekaboo. | Below Storage Room free | Restaurant Toilets chain lure |
¶ Kill Methods
The powerful isolation methods available in Bangkok mean that regular kills pose little challenge, allowing for loud or even loud live kills in most situations. Most accidents, however, require unique setups on this hard-to-traverse map. Jordan features no particularly difficult accident kills, but Consumed Poison, Electrocution, and Falling Object require specific knowledge. Ken features a Falling Object kill that is prone to non-target kills, as well as Fall, which is generally considered the hardest condition on the map.
Kill method resources for Bangkok
| Kill Method | Jordan Cross | Ken Morgan | |
|
Loud Kills | Studio Bathroom shoot and hide | For Bugman spins, sedate the reception once Jordan sits or lure him to the Storage Room | Restaurant Toilets soundproof after Otis is KO'd | Storage Room after Basement Emetics, hide both |
|
Loud Live Kills | Studio Bathroom safest: shoot and hide, 2nd cycle 5:00 | Bugman: lure Jordan inside, then sedate the reception | Restaurant Toilets soundproof after Otis is KO'd | Storage Room after Basement Emetics, hide both (Tranq preferred) |
|
Impact Explosive | Studio Bathroom, Reception, Storage Room work the same as loud kills | Speedrun wallbang from below the booth | Restaurant Toilets soundproof after Otis is KO'd | Storage Room after Basement Emetics, hide both |

|
Consumed Poison | Start Recording Crew, bump Jordan and poison his beer bottle: fast 1:25, gun 1:45, Sieker 3:10 | Birthday cake backup 3:30 | Banned for Ken Morgan |
|
Drowning | Make Jordan sick in his booth, after Peekaboo, or elsewhere upstairs | Restaurant Toilets simple, only one civilian enters | Basement Emetics straightforward once Otis is KO'd |

|
Electrocution | Start Recording Crew, crowbar Penthouse, Coins and 2:20 death or Snail to remote | Start Suite, Snail Lure below the booth | Restaurant Toilets, sink in both rooms | Sink below Storage Room, live kill or KO Otis first |

|
Explosion (Accident) | Start Recording Crew, take a propane from the birthday party, set up in the booth | Start Suite, Jordan Peekaboo into Oil Canister kill | Propane at birthday party and behind tuk-tuk, or bring Oil Canister | Drive-by kill is advised |

|
Fall | Peekaboo or extended chain lure to Studio Balcony | Patio for Ken, dump him off the ledge, watch Groundskeeper and Hotel Staff | Hotel Staff Lure slow alternative |

|
Falling Object | Chain lure or peekaboo, briefcase on jacuzzi, live kill | Remote chain lure setup from Recording Crew | Snail lure from Suite | Specific lamps in the restaurant, in front of the plates (0:53, 4:00) or after leaving them (1:33), watch Otis | Coconut backup |

|
Fire | Banned for Jordan Cross | Banned for Ken Morgan |
Bangkok also contains relatively few lethal melee weapons compared to most maps. Most are easy to locate, but the Katana and Sapper's Axe can make spins significantly longer.
Lethal melee resources for Bangkok
| Item | Description | Item | Description |
| Fiber Wire | Not found on the map | Kitchen Knife | Studio Kitchen | Restaurant Kitchen | Birthday Cake Room |
| Cleaver | ONLY in the Restaurant Kitchen, behind the Kitchen Staff start | Letter Opener | Studio Office with Jordan's Bodyguards | 47's Suite Bedroom |
| Fire Axe | Staircase on every floor | Jordan's top floor | Behind Kitchen Freezer | Sapper's Axe | ONLY in the Basement, in the corridor below the Restaurant Kitchen |
| Hatchet | ONLY on the Garden Patio, below the camera, next to the sleeping guard | Screwdriver | Recording Studio Agency Pickup | Storage Room, under the Exterminator camera |
| Katana | ONLY on Jordan's top floor, in Heidi's Bedroom, next to the Guitar | ||
¶ Templates
While other aspects of the map, such as traversal, can be restrictive, Bangkok is considered one of the simplest and most straightforward maps when it comes to templates and strategy selection. While accidents and suit spins complicate decision-making as they do on all maps, Bangkok generally requires very few decisions at the start of each spin.
Thanks to Jordan being much easier to approach during the first minute than later on, most Bangkok spins follow the rule of killing Jordan first and Ken second. By reading the Jordan conditions first, the starting location and opening route become almost automatic, with the goal of meeting Jordan by 1:00 in the correct disguise and with the required kill item. Once Jordan is eliminated, Ken is typically made sick using one of the standard methods (restaurant, basement, or patio).
In some spins, however, Jordan cannot realistically be eliminated in the first minute. This is most commonly caused by inconvenient disguise combinations or specific lethal melees. In these cases, a Bugman strategy is usually preferred, allowing Ken to be eliminated first before preparing a later Jordan kill.
🟢 Recording Crew Start (Durian)
If Jordan has to be eliminated disguised as Recording Crew, Jordan Cross' Bodyguard or Kitchen Staff, the spin can usually be completed simply and quickly from Recording Crew start. If the kill condition allows for it, the first kill can be done as early as 0:25 in the booth or the bathroom. With this amount of time available, reaching Ken is rarely an issue: fetch the second kill item and disguise before approaching Ken. For a first spin in Bangkok, restaurant emetics are suitable, although waiting for basement timing is often more competitive.🟡 Peekaboo & Kenetic Impact (Durian)
While a recording-floor disguise generally means a booth approach, every other disguise (except Morgan's Bodyguard and Stalker) leads to a Jordan Peekaboo at 1:00. Similarly to the first template, this is only to be used if Jordan can actually be killed upstairs at that time. This early kill lines up very well with a Kenetic Impact strat, which simplifies the rest of the spin significantly: get everything for Ken and reach his sick spot within two minutes.🟡 Bugman (Durian, Pistol)
Bangkok spins can get significantly harder if Jordan cannot be killed around the first minute. The clearest examples involve the Sapper's Axe kill method or the Morgan's Bodyguard disguise. In cases like this, the order of kills must be flipped: stay on the ground floor, let the hotel director call Jordan down, deal with Ken, and prepare for Jordan's arrival. As explained in the Bugman strategy, the template allows for both live and loud kills for Jordan, but the exact isolation method may differ.🔴 Suit Bugman (Durian, Pistol)
If Suit appears in a Bangkok spin, available approaches are already more restricted, especially so if it's combined with Jordan being unkillable in the first minute. The fastest and easiest Bugman strat is done from Hotel Security start, but it can be beneficial to also be able to perform Bugman from a suit start. This slightly more technical variant is its own template because it significantly changes timings: Jordan is lured roughly 30 seconds later and from farther away from the atrium. On the flip side, this longest template leaves enough time to fetch anything for either target before each kill.¶ Useful Info
The following section covers useful rules of thumb, additional mechanics, and other information about Bangkok and its targets.
Map Traversal
Bangkok is generally a difficult map to traverse due to its vertical layout, tight trespassing areas, and camera placement. While the map will never feel as open as Sapienza or Miami, following the routes below should make getting around much easier.- Jordan First: Reach Jordan from any of the main starting locations by taking the stairs from Recording Crew, or, if trespassing, by climbing the pipe at the back of the recording studio.
- After Jordan: The two main ways to reach Ken or the basement after killing Jordan are taking the stairs all the way down or sliding down the pipe (also known as Downpipe) to reach the ground floor more quickly.
- Bugman & Basement: After initiating the strat (regular or Suit Bugman), traversal becomes much simpler, as the restaurant is public and the Storage Room is easily accessible in most disguises. For moving through the basement, taking the free Waiter disguise is recommended.
Cameras & Evidence
No map has more challenging cameras or evidence deletion than Bangkok, but with good routing and careful movement, players can often avoid yellow guns altogether or quickly return them to green.- Important Cameras: Of the 13 cameras in Bangkok, only five cause the most trouble. Three are stacked below one another near the Recording Crew start, requiring patience whenever taking the stairs. Beyond those, two additional cameras complicate Suit starts before and after approaching the rooftop, making it worthwhile to destroy them.
- Early Evidence: Players who are wary of the cameras can often delete the evidence even before killing Jordan. From Hotel Security or Hotel Staff starts, the evidence room door is open at the right time, allowing a tight but consistent shot on the evidence box between 0:22 and 0:28. The same angle can also be used later in the run and is the most common way to return to green guns.
- Late Wallbang: If a player is caught on camera but the route does not pass the security room, wallbang opportunities are still available from both the rooftop and the atrium.
Delaying Ken
Ken's cycle is consistent and features relatively few proxies, with the most famous one being the conversation he has at the reception. Aside from this, there are two main ways Ken's cycle can be slowed down:- Triggering Ken's phone call on the patio by getting close to him or simply going to the balcony in 47's Suite delays him by 1:02.
- Changing out of the Hotel Staff disguise at any time triggers Ken to become disappointed with the hotel services, delaying him by 18 seconds.
Restaurant Toilets NPCs
The following NPCs can interfere with Ken isolations in the Restaurant Toilets.- A civilian named Ronald Sump enters the first stall at 2:20, washes his hands from 3:22, and leaves at 3:48, before returning at 6:40. He sits just outside the Restaurant, and if he is distracted during this time, he resets his sitting animation, delaying his arrival by up to two minutes.
- A Kitchen Staff member enters the second stall at 3:30, washes his hands from 4:10, and leaves at 4:45. He is proxied by being upstairs, so he does not come to the Restaurant Toilets during Bugman spins.
- A civilian named Jackie Carrington enters the Restaurant Toilets at 6:40 and leaves at 7:10, but does not enter either stall.
¶ Further Learning
The following strategies are not commonly used in today's Roulette meta, but understanding them can be useful for players aiming to master the map.
Jordan Snail Lure (Snail, SMG/Key Hacker): A Bugman alternative, bringing Jordan down one floor.
Start in 47's Suite and make your way to the room below Jordan's booth. Throw the Snail at Jordan's feet and reposition it nearby. By around 1:40, Jordan should reach the Snail and be KOd by it. Alternatively, start from Hotel Staff for a tighter but less loadout-heavy strat, by taking the Master Keycard in the basement.The strength of Snail Lure is not in its generic isolation, although it can compete with many Bugman spins. This strat can shine for Jordan Electrocution and Jordan Falling Object spins, however, as it is faster than any approach that requires setting up on the top floor.
Jordan Wes Shot (Pistol): A tight lineup (which varies by player!) to keep Jordan in his booth until around 2:00.
Until the Bruce Lee patch in September 2025, Wes Shot used to be considered a powerful tech to delay Jordan enough until the Abel de Silva disguise was acquired. Since then, however, the lineup for the shot has changed for everyone, and now most players find the lineup to be tighter and not even the same for everyone. Therefore, the only advice for this strat is to experiment with the lineup, but the benefits are fairly minor compared to the difficulty of the setup.Ken Upshot (Pistol, Durian optional): A niche emeticless way to lure Ken on the rooftop.
Ken Upshot (also known as Wokeshot) is the most niche and perhaps most technical strat on Bangkok, used to lure Ken upstairs with a bullet distraction. Typically, after the Jordan kill, two lineups can be used for activation, one from the office and one from the rooftop. From this point, Ken can be brought to 47's Suite with a Durian, or isolated on the rooftop. With the Kenetic Impact gaining traction, however, it is difficult to see Wokeshot being optimal for anything apart from certain Ken Fall spins anymore.Ken Hotel Staff (itemless): An ancient backup, the only itemless Ken isolation.
The Hotel Staff lure for Ken is no longer optimal, but it is important to be aware of an itemless backup for Ken. Talk to Ken as Hotel Staff, and slowly make your way towards the Restaurant Toilets. When Ken gives up on following you, throw an item onto the toilet in the second stall. He will be the one to investigate it, but watch out for the Kitchen Staff arriving at 3:30.Below is a list of various useful links and resources regarding Bangkok Roulette:
- Every Bangkok Spin in Roulette Rivals, a comprehensive list by RRStats
- Every Bangkok Spin from RR17 by SpottheCat
- Bangkok Learnings by Moo, showcasing Wes Shot and Upshot examples
- Target cycles (Jordan Cross, Ken Morgan) by BluntsNBeatz
- Suit into Disguises, an unofficial guide by Moo
- Jordan Consumed Poison (All Disguises) by In4Fun